So, you want to know how to build an igloo? No problem! But first off, let’s make sure that you’re the right type of person to build an igloo… because us igloo builders are a special breed. We are the ones who relish the sight of a first snowfall! Who get shivers of joy when the temperature begins to drop and the need for winter gear arrives. We do not rush indoors like hibernating bears during these months! Rather, we are the arctic wolves and polar bears of our species! The ones who can’t wait to hit the slopes, snowshoe through the woods and skate across frozen lakes. We are the tough, the hardy, the intense! The ones who don’t turn away from a challenge or from a night spent outdoors. We know that there’s no such thing as bad weather, only insufficient gear. We are the campers that winter was made for!
If this sounds like you, then you might be up for this type of challenge. So, let’s find out if you ready to join the ranks of other igloo builders and take your winter adventuring to the next level!
Building an igloo is no easy task. No matter how much knowledge and skill you have, you still need to have the right amount of snow and ice, as well as the right consistency. Without this, it’s impossible to properly build the ice blocks needed for a strong and secure igloo. Relying on Mother Nature is not a predictable solution however neither is sleeping in a tent during sub-zero temperatures! (It’s true! Igloos are warmer than tents! Want to know more? Check out this fun video that explains the science behind how an igloo keeps you warm!)
So, if Mother Nature is unpredictable but snow is warmer than a tent, what’s the answer?
This is where Ed Huesers, an avid winter camper from Colorado, comes in. After sleeping out in a cold tent for one too many nights, he knew that there must be a better way. He began experimenting and learning how to build an igloo. He began by modeling his plan after the Inuit and their igloo building techniques. Ed first experimented with different types of snow wall constructions. However, when Mother Nature proved her instability, Ed realized that he would need some extra help.
As the owner of a plastic mold manufacturer, Ed started using various plastic forms to try and build different kinds of snow walls. This helped him to discover a practical solution for igloo building. He called his invention the ICEBOX™ Igloo Maker and when he took it to market, a revolution was born!
The ICEBOX™ igloo maker is capable of creating an overnight winter shelter for a large group of people in just 1.5 to 3 hours. It weighs about 2.35 kg, which is a bit heavier than your average one-person tent. However, since one ICEBOX™ igloo maker can make a shelter that houses multiple people, it actually helps to save weight while traveling!
How to Build an Igloo with ICEBOX™
Here’s a breakdown how to make an igloo with ICEBOX® igloo maker:
- The Snow: Obviously, the key ingredient you need to create an igloo is snow! However, the quality of the snow affects the building process. Typically, you need the dense snow that lies beneath the top-most layer to build a solid igloo. However, when using the ICEBOX® igloo maker, just pack whatever snow you have into the ICEBOX® mold and you will instantly create the perfect block of snow for building.
- The Center: In order to ensure that your igloo is perfectly circular, push the stake of the ICEBOX® igloo maker into the center point of your igloo. Then assemble and adjust the length of the pole accordingly. For example, if you want an 8-foot igloo, your pole should be extended to four feet.
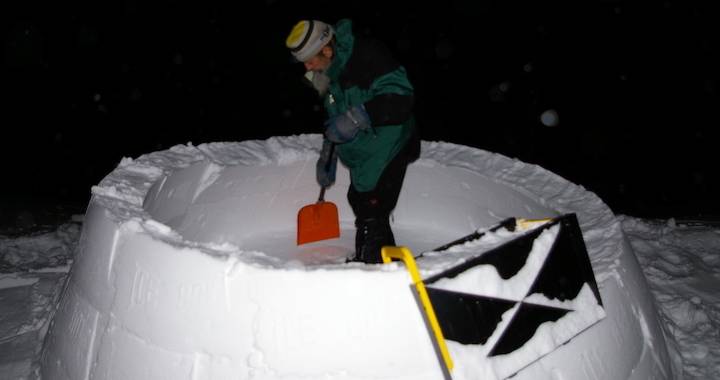
- The Ramp: Shovel and pack snow into the ICEBOX® mold to build a short ramp over the first few blocks. After the ramp, fill the mold full for the rest of the igloo build. Adjust the pole length for the next layer each time the ramp area is passed creating a stable and solid arch. The snow is packed into the tool with a push to make the snow sinter and bond to the previous block and the wall below.
- The Dome: As the wall rises, you can remove the Outer Panel from the mold as it is no longer needed to prevent the snow from falling out. As you finish the dome, you can also take off the yellow panel, leaving only the inside panel. To finish the dome, the pole holds the inside panel in place and snow is packed on from the outside.
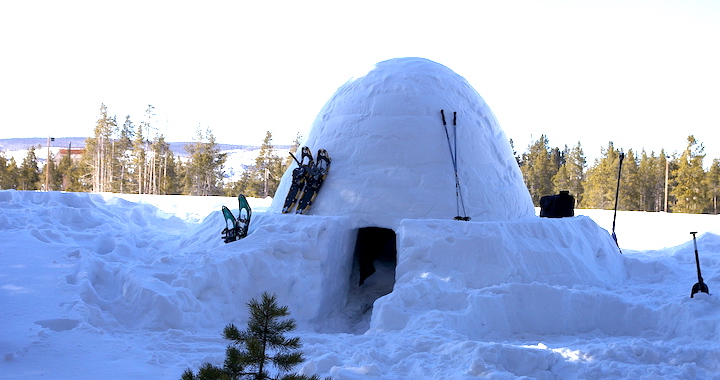
- The Doorway: Digging a tunnel at the bottom of your igloo is the best way to keep the cold out but you can also use a cut out a door, if you prefer. Cutting a door out of the wall and adding the cold trap will also hold your heat inside.
Your igloo is now complete and fully functional! For added strength, simply spray some water onto the outside of the igloo. This helps ice to form, thereby holding the igloo even more firmly in place.
Igloo construction is now safer, easier and convenient thanks to Ed Huesers ICEBOX® igloo maker. Grab yours today, get out into the winter wilderness and claim your spot amongst the toughest of winter campers!